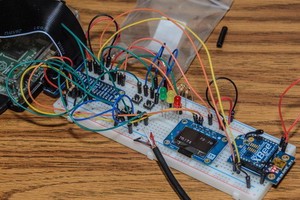
Got bored, built a thermostat

Well sort of. The other week we had the fun of having most of our heating ducts torn out and replaced to get rid of some asbestos and add A/C. They also gave us a new thermostat for reasons that are beyond me, the old one has exactly the same functions but is slightly easier to use. These cheap thermostats are all the same, same functionality, almost identical controls and all terrible to use. This new one requires me to set 48 different values to set the schedule and then despite clearly having a basic micro-controller in there still requires me to flip a manual switch to select between heating and cooling.

We had been offered more expensive options like Nests, but they are all way more than I need and $200 is kind of ridiculous for something that really should be set and forget. Which got me to wondering just how hard it would be to knock up something that did a decent job myself. Turns out that all most thermostats spend their lives doing is connecting wires together. There is a common line, connect the heater wire to it and the heat comes on, connect the AC line to it and the condenser comes on, etc. So all you need is a simple controller, some outputs to drive relays, some buttons for controls and of course a temperature sensor. Well I had all of that in my cupboard from other projects.

I have a basic Arduino but using an old Raspberry Pi gives me more options, like writing the code in JavaScript and using a USB Wifi dongle to allow for remote control. Add a few buttons for controls, some LEDs to represent relay switching, a small I2C display for some status and a 1-wire temperature sensor and you have everything you need. All very easy to talk to from node after I finally found the right package of node for the Pi (it is far from obvious). The only struggle was the display, while I could send it commands my only reference for the right set of commands were some C++ code for Arduino boards and it uses a slightly weird RAM indexing style that threw me for a bit.

An Xbee module mounted on a breadboard
Remote temperature sensor

Oh and an Xbee module. Might as well have some fun right? Xbee’s are fantastic little devices that are cheap and automatically form wireless mesh networks letting you transmit serial data around with next to no set-up. They also have analogue and digital input and output pins that can be read and written remotely, you don’t even need an additional micro-controller. As it happens I had a second temperature sensor handy that outputs as a simple voltage which a remote Xbee can read and periodically send updates about so with that my thermostat can sense the local temperature and the temperature in any room I put an extra Xbee into.

I got the basic code mostly working too so now I guess I get to decide if I want to do this properly or not. I’d need to add actual relays to control the HVAC systems. There is no plug outlet near the thermostat wires so it needs power too. Happily the thermostat wiring includes 24VAC just for thermostats to use, should be simple to convert that to the 5V the Pi runs off though I’m not too sure on current availability. I’d probably switch out the 1-wire temperature sensor for either a plain analogue one or an I2C option since I’m already using that for the display anyway though a bigger display would be nice too. A Pi Zero which is both smaller and more powerful than the old model B model that I’m using here would be a good idea but as far as I can tell no-one has any in stock right now.

Once you throw all that together you’re probably still getting close to $100 for the main unit and one remote sensor which is getting on the pricey side. But then since I’d have complete control of the code maybe that would be worth it.

It blows my mind that these sorts of tools are cheaply available now. When I was a kid and playing with electronics I got to use logic gates to do fun things. Maybe every once in a while a tiny barely useful micro-controller which you programmed in assembly. I remember buying a kit that attached to the ISA bus (that ages it!) of an old PC to give you I/O lines to play with. I don’t remember the cost but I know for sure it cost more than an entire Raspberry Pi costs today. The idea that you can buy basically a full computer with easily accessible inputs and outputs for just a few dollars is incredible. I can’t wait until ChloĆ« wants to experiment with this too.

Pop-free sound from a Raspberry Pi running XBMC

UPDATE: I’ll leave this around for posterity but a large part of this problem has now been fixed in the latest Raspberry Pi firmware. See here for instructions for raspbmc until that gets updated.

I’ve been in the process of setting up a Raspberry Pi in my office so I can play my mp3 collection through my old stereo. It’s generally gone well and I have to take my hat off to the developers of Raspbmc which makes setting up XBMC on the Pi ridiculously easy and fast. It didn’t take me long to have Airplay set up and running as well as being able to use my phone to remote control XBMC to play things direct from my music library sitting on my Synology NAS. Quite a nice setup really.

Just one problem. I play the music out through the Pi’s audio jack which doesn’t have a fantastic DAC. The big noticeable issue is audible pops every-time XBMC starts and stops playing. For Airplay this isn’t too bad, you get a pop when it first starts but only another after you stop playing. Playing direct on XBMC though you get two pops between each track as it stops playing one and starts the next. Very annoying. It’s a pretty well known problem and the best solution so far is to simply never stop playing. If you have a player that uses pulseaudio then you can configure it to keep the audio stream going even when idle. Of course it isn’t that easy, XBMC doesn’t use pulseaudio on the Pi. There is some work going on that might change that but for now it is very buggy to the point of being unusable. It seemed I was stuck … or was I?

It took some experimentation but I finally came across something of a hack that solves the problem for me. It probably works on other distributions but I did all this using Raspbmc.

First as root you want to do this:

echo "snd-bcm2835" >>/etc/modules

This makes the kernel module for the sound devices load on startup. It allows alsa and by proxy pulseaudio to talk to the audio hardware. Next edit /etc/pulse/system.pa and comment out this line:

load-module module-suspend-on-idle

This tells pulseaudio to keep the audio stream alive even when not playing anything. Now reboot your Pi. Once it is started up copy a plain wav file (nothing mp3 encoded or anything) to the Pi, log in and play it through pulseaudio:

paplay test.wav

If it doesn’t come out of the speakers then alsa might be trying to play to the HDMI port. Try running this then running the above command again:

sudo amixer cset numid=3 1

What just happened is pulseaudio played the sound file, but now should have kept the audio hardware active and will continue to do so until the Pi is next turned off. You might think that that might mean that XBMC can’t play anything now. You’d be wrong, it plays just fine and no longer suffers from the popping between tracks. Occasionally I hear a pop when I first start playing after startup, but after that I’ve not heard any issues.

There are probably easier ways to initialise pulseaudio but I don’t mind playing some sound on every startup to let me know my Pi is ready. I made it automatic by sticking this at the top of .bashrc for the pi user (which is used to run xbmc):

/usr/bin/paplay $HOME/test.wav

It means it also plays every-time I log in with ssh but I’m not expecting to do that much now it’s all working. I’m sure someone will point out the better way to do this that I’m too lazy to look for now everything is working for me.