I had a plan to go back to doing some more traditional Fractal work this weekend, unfortunately the best tools out there (UltraFractal is a fine example) tend to be on Windows and all my machines are Macs right now. So I figured it would be a simple task to use Bootcamp to install Windows onto my laptop, but like much else that I’ve tried to do these past few weeks it turned into a bit of a nightmare so I figured I’d document how I managed it.
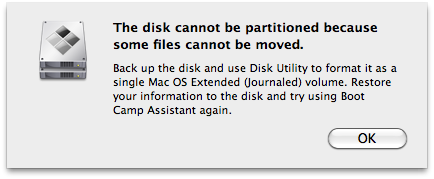
The way Bootcamp works is relatively simple, it shrinks your main OSX partition and then creates a new Windows partition at the end of the disk, then you just install Windows onto that. The problem is that Bootcamp isn’t very good at shrinking the main partition when there are files sitting around at the end of it. As every good OSX fanboy tends to blather about, OSX works hard to avoid fragmentation within files, unfortunately I suspect this tends to spread individual files around all over the disk as the OS tries to find contiguous space to move them to. So when you try to use Bootcamp to shrink your partition you get this lovely error telling you that some files cannot be moved and suggesting you basically reinstall OSX to fix it:

There are lots of suggestions on the web for combating this. Most revolve around paying for defragmentation software. I didn’t want to pay though so here is a free alternative.
It should go without saying that this involves partition wrangling. Make sure you backup first, double check before doing every step, don’t blame me if you lose data.
Go get the Gparted live CD, burn it to a disk and boot from it (hold down Option while restarting). GParted should show your disk with two partitions in in, one small one at the start that claims to be FAT, ignore this one. The rest of the disk should be HFS+ and named after your Mac install. Select this partition, click the resize button and choose how much to shrink it by. The easiest way is to just put the amount of space you want for Windows in the space to leave at the end box. Click ok and then apply then wait patiently while it does a far more competent job than Bootcamp could of moving your files around.
Restart into OSX, open Disk Utility and go to the partition for your main disk. You should now see your OSX partition taking up less space and a gap at the end. Click the + sign to add a new FAT partition and name it BOOTCAMP. You should now find that the Bootcamp assistant recognises that the Windows partition exists and will allow you to start the Windows installation.
Make sure to read the bootcamp instructions, there are some real gotchas in there during the Windows install, and make sure to read the support info on how to allow Windows SP3 to install if you want to do that, without that I ended up with a broken Windows.